.png)
Use of WebDriver Manager
To use WebDriverManager in your Selenium project with Maven
follow these steps based on the provided Image:
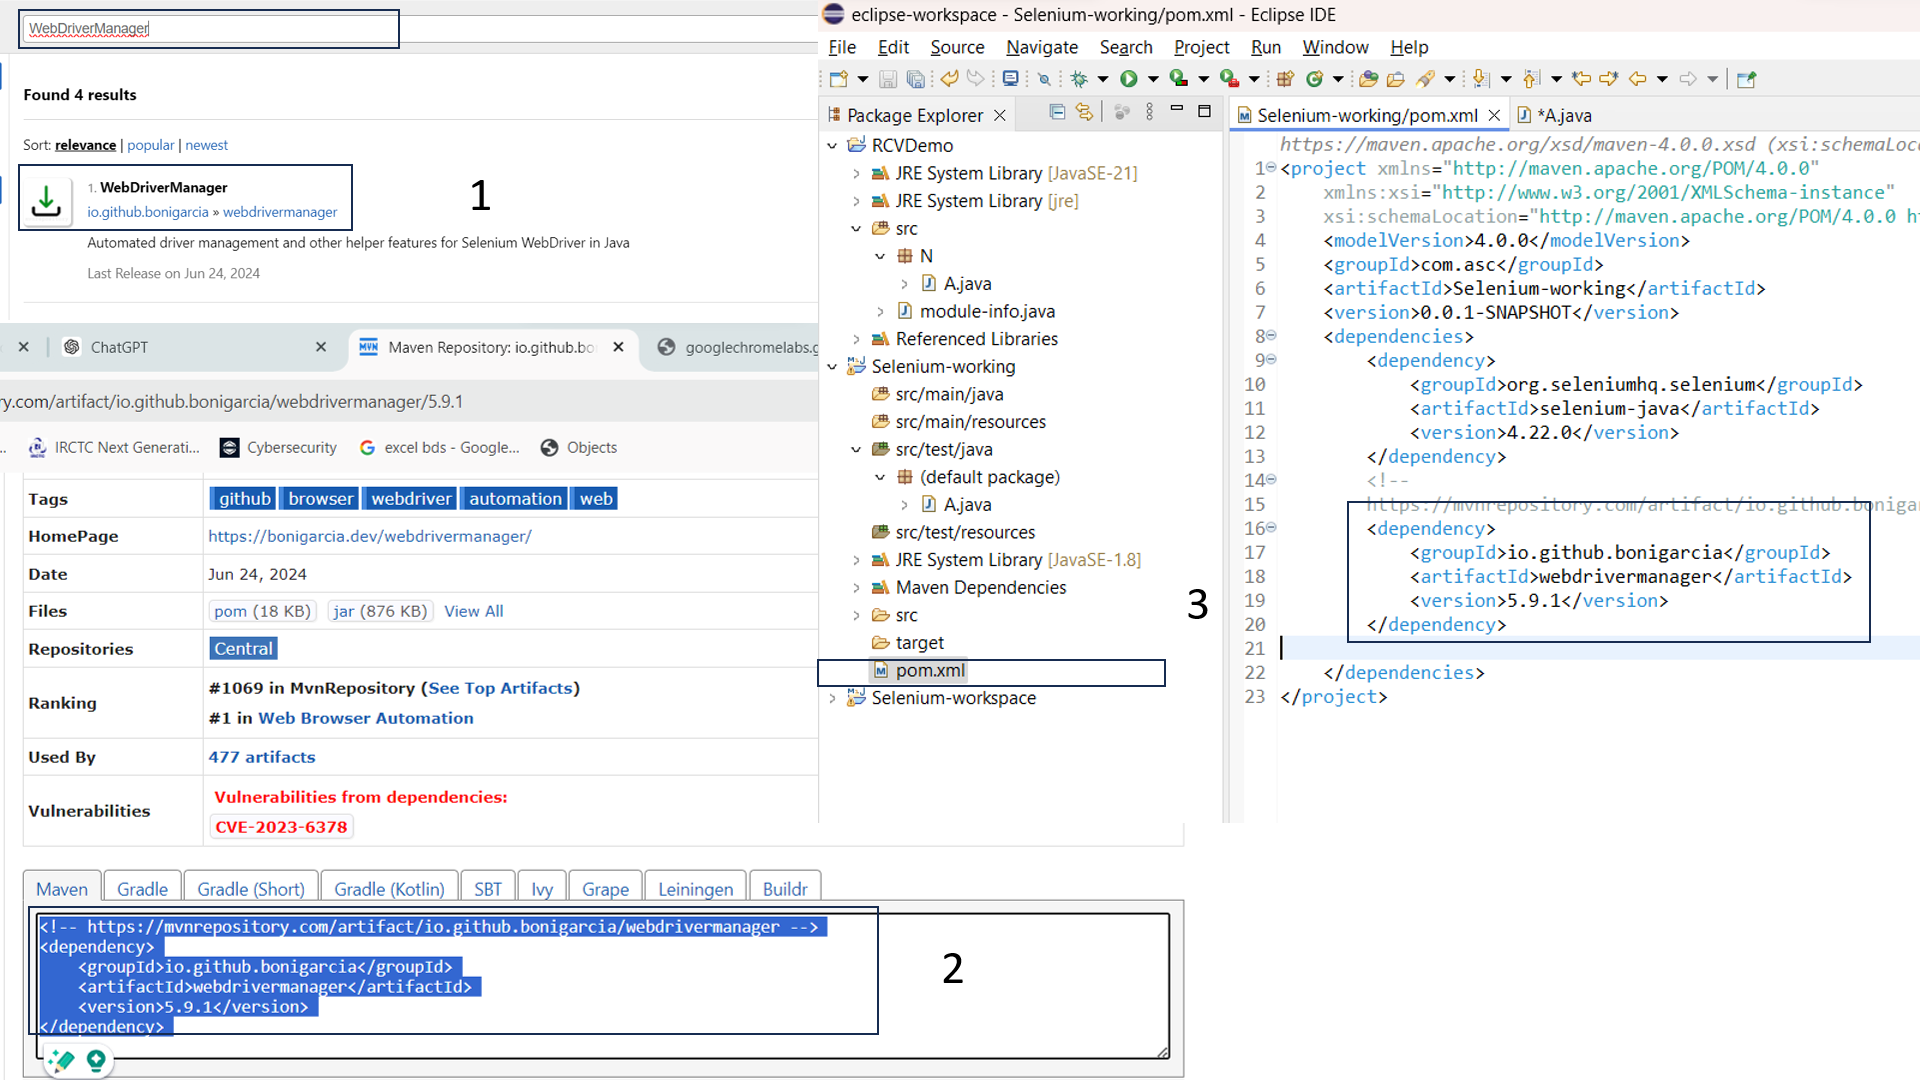
Step 1:
- Search for WebDriverManager in Maven repository:
- Click on the search icon
- Search for WebDriverManager
Step 2:
- Copy the Dependencies Information:
- Click on the WebDriverManager
- Click on the latest version
- Copy the dependency information for WebDriverManager from the Maven repository (as seen in part 2 of the Image):
Step 3:
- Add Dependency to pom.xml:
- Open your pom.xml file in your Maven project (as seen in part 3 of the Image).
- Add the copied dependency information under the
section of your 'pom.xml' file.
Step 3:
- Save pom.xml and Update Maven Project:
- Save the pom.xml file.
- Update your Maven project to ensure that the new dependency is downloaded and available.
- Once you have added the dependency and updated your project, you can start using WebDriverManager in your Selenium tests.
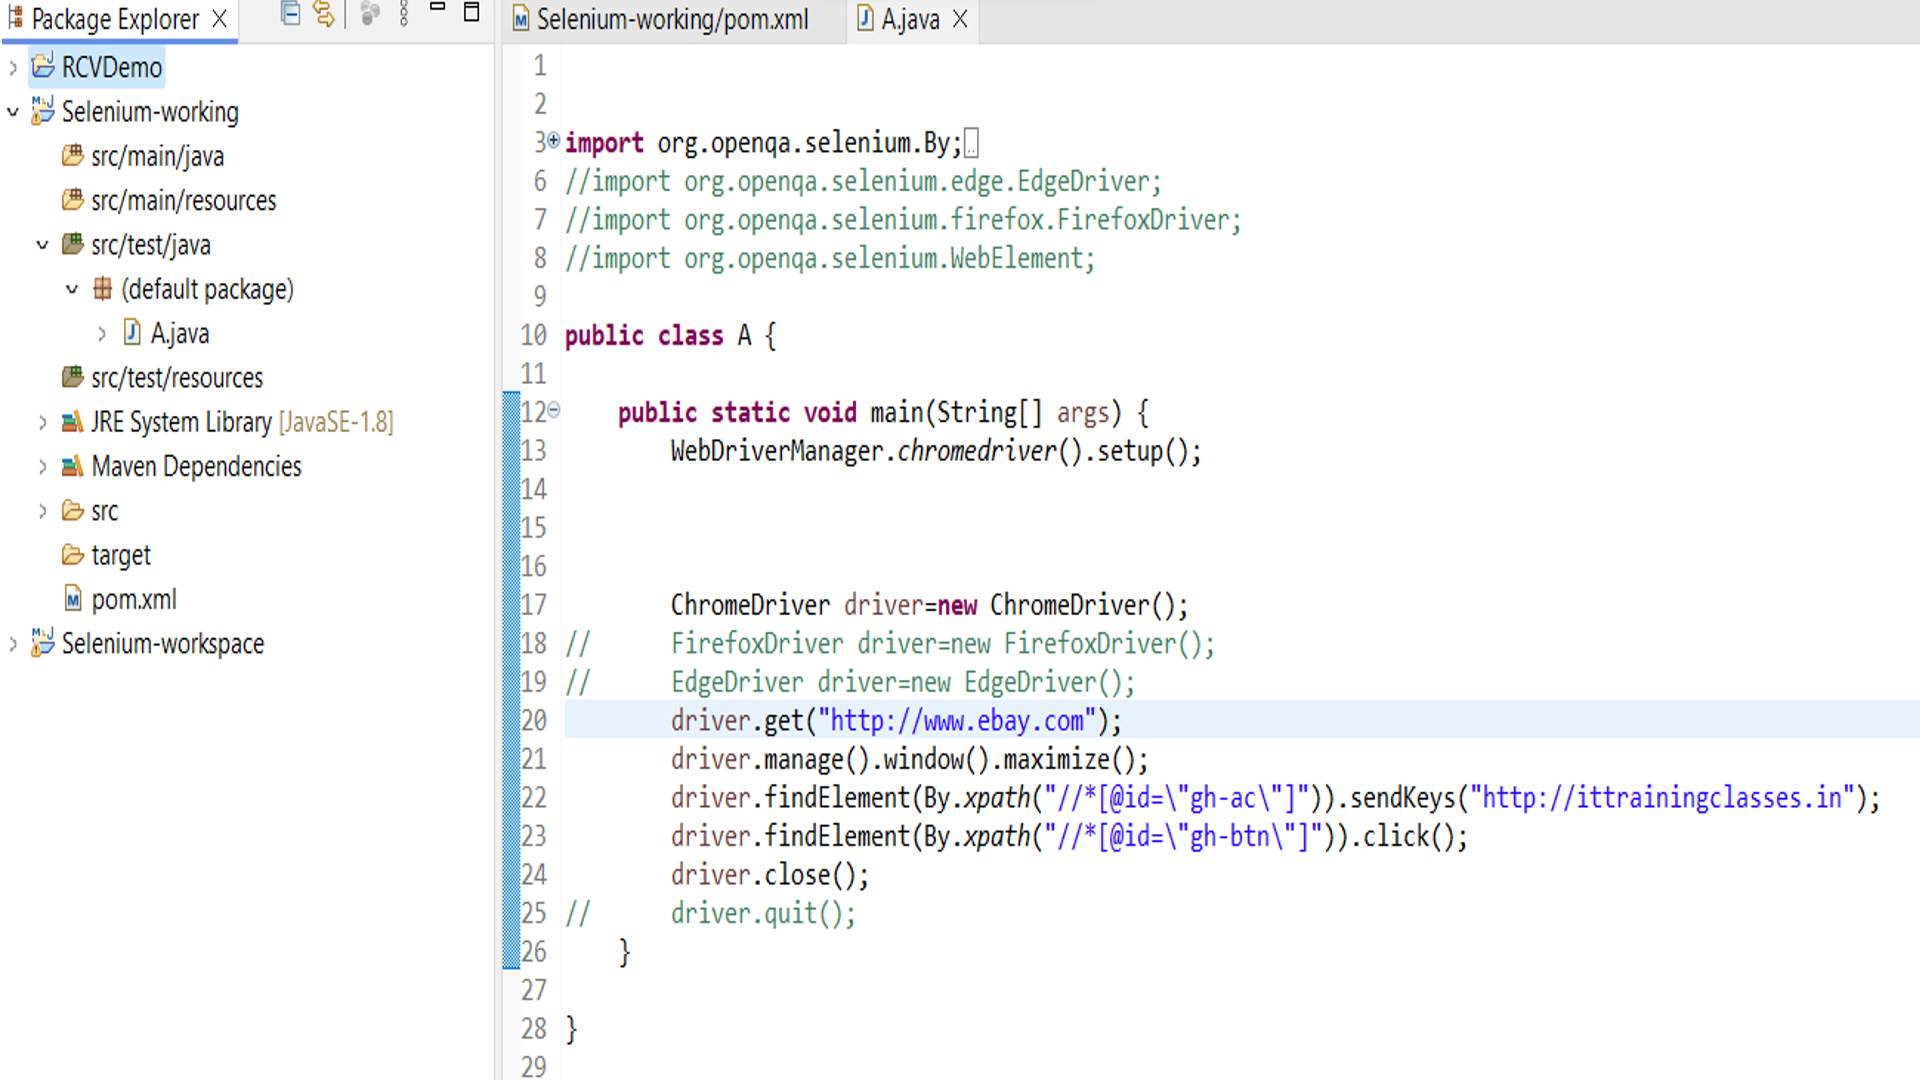
This example demonstrates setting up WebDriverManager for Chrome and launching a Chrome browser instance with Selenium.
You can similarly set up WebDriverManager for other browsers like Firefox, Edge, etc.,
- by using :
- WebDriverManager.firefoxdriver().setup();
- WebDriverManager.edgedriver().setup(); and so on.
You know more detail about it By following this image
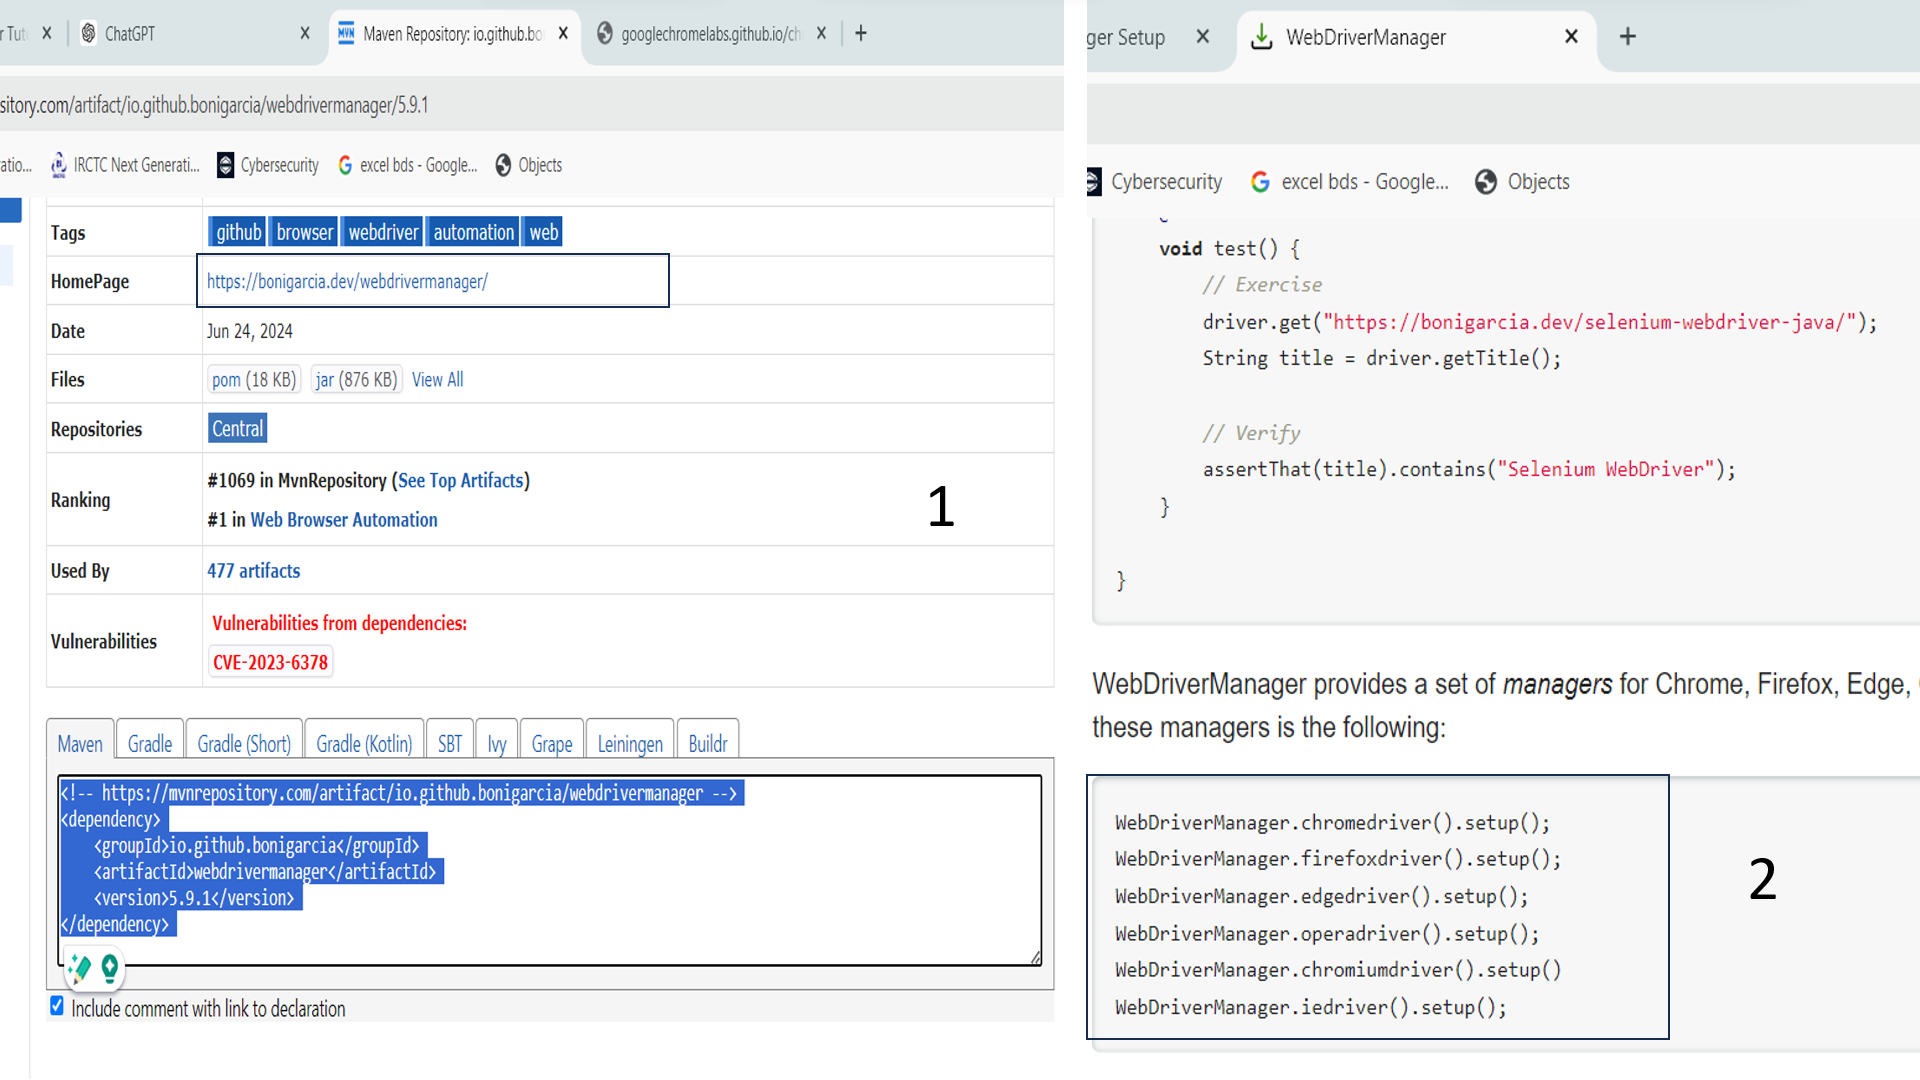
- The dependencies you copied are on the same page where the Homepage section is located, and you can find the link there.
- When you click on that link then the WebDriverManager page will Open and you get detail information about the webDriverManager.